This user guide provides the steps required to configure your iPhone/iPad running iOS with Wireguard from StarVPN.
Step1 – Register an account with StarVPN
Head on over to our pricing plan options and choose a VPN plan that suits your needs. You can register on checkout or directly here.
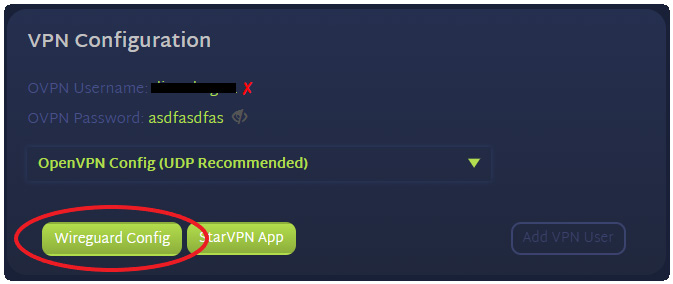
Step 2 – Download Wireguard Configuration
Log into the StarVPN member area dashboard. Click on Wireguard Config to download the configuration file. Each slot will contain a unique wireguard configuration file.
Step 3 – Download the Wireguard App from the App Store
Download and install the latest Wireguard App from the Apple App Store.

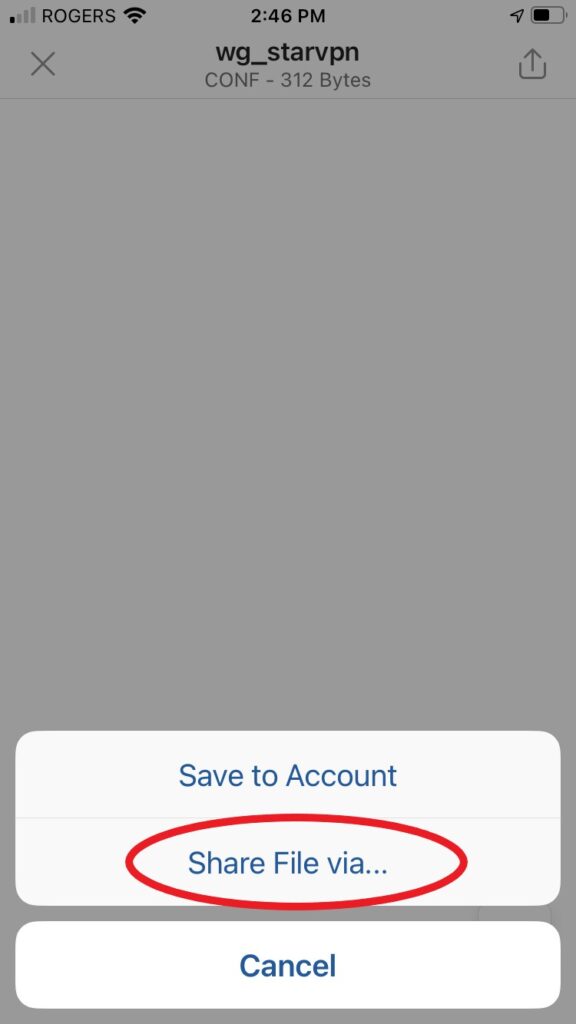
Step 4 – Input Tunnel Configuration
There are a few different ways to import the WG Configuration. In this article we will demo the email method.
- Email yourself the StarVPN configuration file downloaded in Step 2.
- Tap on the attached file
- Tap “Share File Via”
- Tap “More”
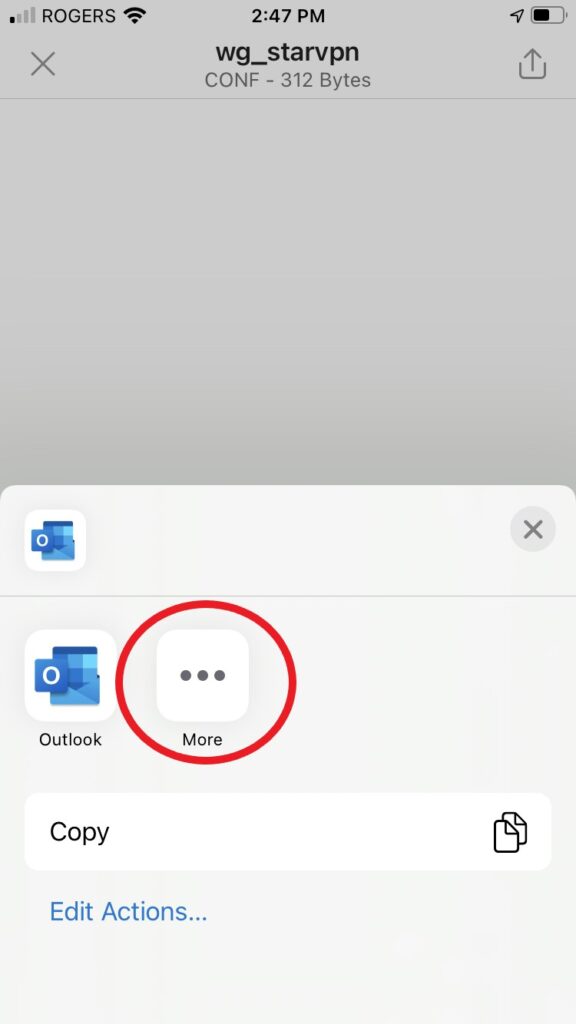
- Select “Copy to Wireguard”. The iOS app will now import the configuration into the Wireguard App.
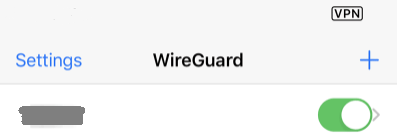
Step 6 – Connect
Click the “Activate” button to be connected to the StarVPN Wireguard VPN. If the connection is successful, a green indicator light will appear next to the radio button and the VPN indicator will be visible on the top of your screen.
Once you are connected, login to the StarVPN dashbard to configure your IP Type, Geo-location and ISP. No additional configuration files are required.