This user guide provides the steps required to configure the DD-WRT Router with Wireguard Client from StarVPN.
Step1 – Register an account with StarVPN
Head on over to our pricing plan options and choose a VPN plan that suits your needs. You can register on checkout or directly here.
Step 2 – Download Wireguard Configuration
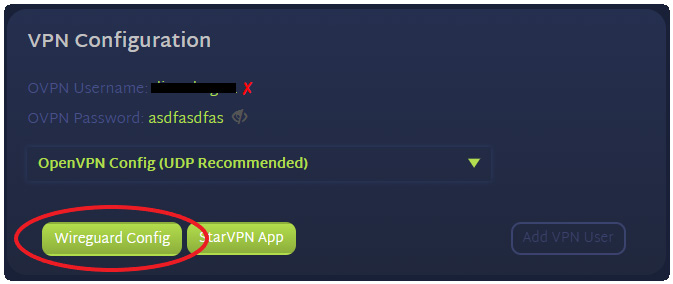
Log into the StarVPN member area dashboard. Click on Wireguard Config to download the configuration file. Each slot will contain a unique wireguard configuration file.
Step 3 – Login to the DD-WRT Router to Setup the Wireguard Client
Login to the Router UI by accessing your web browser and entering the Router IP in the address bar. The default address is 192.168.1.1.
Step 4 – Add Tunnel
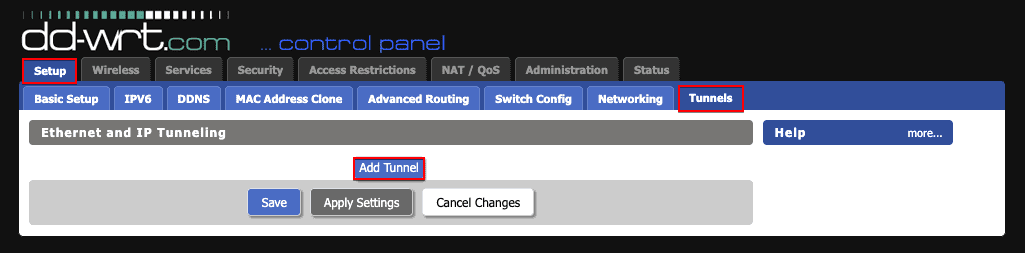
Navigate to the Setup tab -> Tunnels -> Add Tunnel
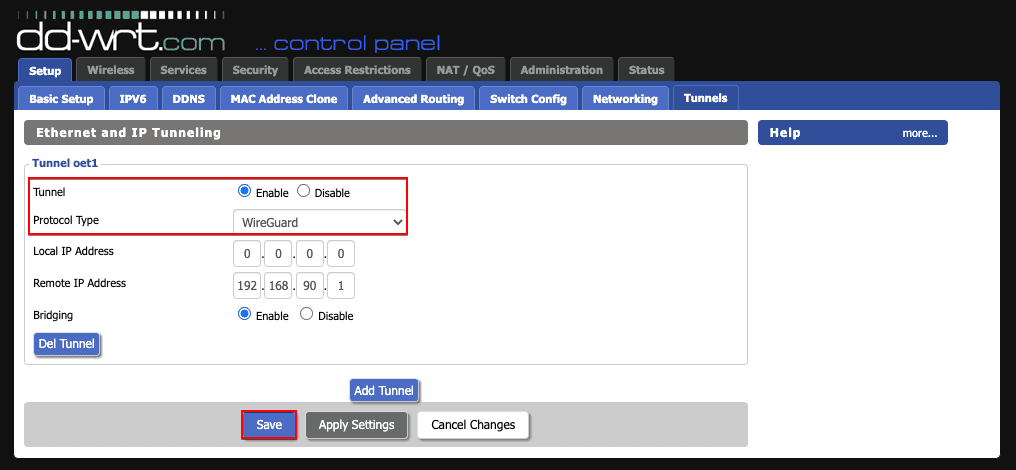
Select Enable Wireguard Protocol and click Save
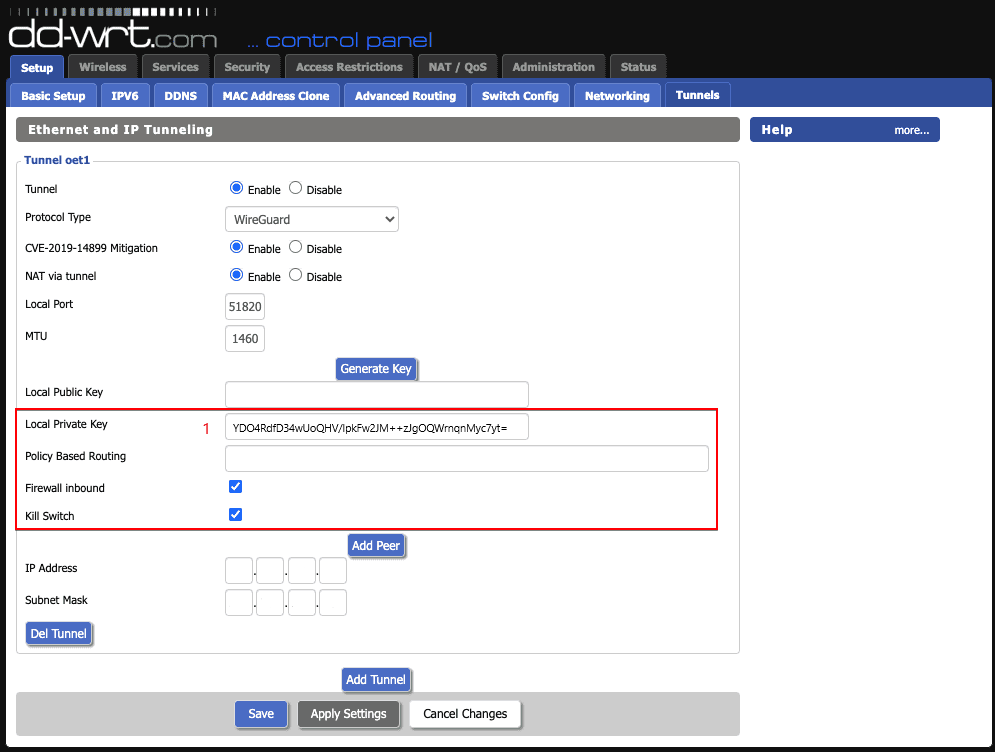
Step 4 – Base Configuration
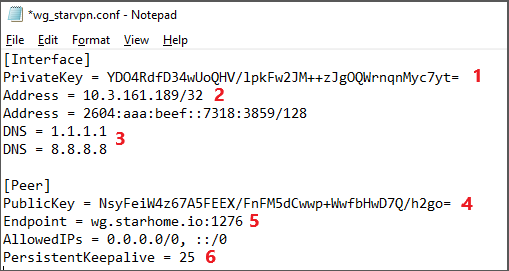
Use the wireguard configuration file downloaded previously from StarVPN dashboard for reference.
CVE-2019-14899 Mitigation: Enable
NAT via tunnel: Enable
Local Port: default value
MTU: default value
Local Public Key: Leave Blank
Local Private Key: Use the value from wireguard configuration file (1)
Policy Based Routing: Leave blank or use default value
Firewall Inbound: Enable
Kill Switch: Optional
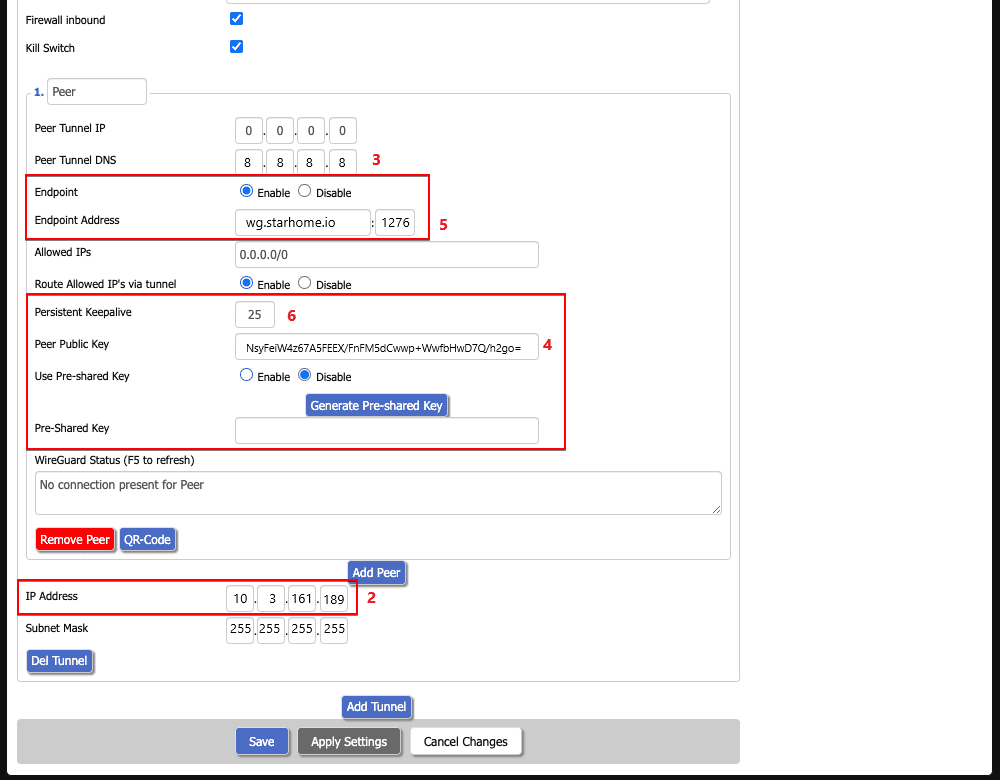
Step 4 – Peer Configuration
Select Add Peer button to display more configuration options below:
Peer Tunnel IP: 0.0.0.0
Peer Tunnel DNS: Use the value from configuration file (3)
Endpoint: Enable
Endpoint Address: Use the value from configuration file (5)
Allowed IP’s: 0.0.0.0/0
Persistent Keepalive: Use the value from configuration file (6)
Peer Public Key: Use the value from configuration file (4)
Use Pre-shared key: Disable
IP Address: Use the value from configuration file (2)
Subnet Mask: 255.255.255.255
Click Save and Apply Settings. That’s it, you’re all done!
You can view your tunnel network statistics at the Wireguard status section.
Once you are connected, login to the StarVPN dashbard to configure your IP Type, Geo-location and ISP. No additional configuration files are required.